रुपेश पवार
IT Professional 5+ वर्षांचा अनुभव
प्रकाशित
15 Feb’२०२६
वाचण्याचा वेळ
12 मिनिटे
स्तर
Beginner
Python शिकताना Input आणि Output हा पहिला hands-on topic आहे. या blog मध्ये फक्त basics नाही, print() चे सर्व parameters, 3 formatting methods, input() validation, multiple inputs, file read/write, and the sys module.
Python Input आणि Output म्हणजे काय?
कोणताही program तीन गोष्टी करतो: Input घेतो → Process करतो → Output देतो. हेच IPO (Input-Process-Output) model आहे. ATM मध्ये PIN टाकणे म्हणजे Input, PIN verify करणे म्हणजे Process, आणि “Welcome!” दाखवणे म्हणजे Output.
Python मध्ये:
Input → input() function — User कडून keyboard वरून data घेतो
Output → print() function — Screen वर result दाखवतो
File I/O → open() function — File मधून read/write करतो
print() Function – Output दाखवणे
print() हा Python चा सर्वात जास्त वापरला जाणारा function आहे. तो screen वर (console) माहिती दाखवतो. एक string, number, list, dictionary, कोणतीही value print करता येते.
# साधे print
print("नमस्कार! Python शिकूया मराठीत.")

# Numbers print करा
print(42)
print(3.14)
print(True)

# Multiple values एकत्र print करा
नाव = "राहुल"
वय = 21
print("नाव:", नाव, "| वय:", वय)

# List, Dict print करा
marks = [85, 92, 78]
student = {"नाव": "प्रिया", "grade": "A"}
print(marks)
print(student)
नमस्कार! Python शिकूया मराठीत.
42
3.14
True
नाव: राहुल | वय: 21
[85, 92, 78]
{'नाव': 'प्रिया', 'grade': 'A'}print() चे सर्व Parameters
बहुतेक beginners फक्त basic print() वापरतात. पण print() ला 4 powerful parameters आहेत: sep, end, file, आणि flush.
print() ची पूर्ण Syntax:
print(*objects, sep=’ ‘, end=’\n’, file=sys.stdout, flush=False)
• sep — values मधील separator (default: space)
• end — शेवटी काय print करायचे (default: newline \n)
• file — कुठे print करायचे (default: screen)
• flush — buffer ताबडतोब flush करायचा का
# sep — values मधील separator बदला
print("राहुल", "प्रिया", "अमित")                  # default: space
print("राहुल", "प्रिया", "अमित", sep=", ")         # comma separated
print("राहुल", "प्रिया", "अमित", sep=" | ")         # pipe separated
print("राहुल", "प्रिया", "अमित", sep="\n")           # newline separated
print(2026, 02, 15, sep="-")                        # date format
OUTPUT राहुल प्रिया अमित राहुल, प्रिया, अमित राहुल | प्रिया | अमित राहुल प्रिया अमित 2026-2-15
# end — प्रत्येक print च्या शेवटी काय येणार
print("Loading", end="...")       # newline नाही, ... येते
print("Done!")                    # याच line वर येते

# Progress bar effect
print("Progress: ", end="")
for i in range(1, 6):
    print(f"█", end="")
print(" 100%")

# Numbers एकाच line मध्ये print करा
for i in range(1, 11):
    print(i, end=" ")
print()  # नवी ओळ
Loading...Done! Progress: █████ 100% 1 2 3 4 5 6 7 8 9 10
Output Formatting – 3 Methods
Python मध्ये output format करण्यासाठी 3 methods आहेत. प्रत्येकाचे advantages वेगळे आहेत. इतर मराठी blogs मध्ये फक्त f-string सांगतात; इथे तिन्ही methods comparison सह शिका!
% Formatting (Old): Python 2 पासून आहे. Legacy code मध्ये दिसते. नवीन code मध्ये avoid करा.
.format() Method: Python 3 मध्ये standard. Readable पण f-string पेक्षा verbose.
f-string (Best ✓) : Python 3.6+. सर्वात fast, readable, आणि recommended. नेहमी हेच वापरा!
नाव = "प्रिया"
वय = 22
marks = 87.567

# Method 1: % formatting (Old Style)
print("नाव: %s, वय: %d, Marks: %.2f" % (नाव, वय, marks))

# Method 2: .format() method
print("नाव: {}, वय: {}, Marks: {:.2f}".format(नाव, वय, marks))
print("नाव: {0}, वय: {1}, Marks: {2:.2f}".format(नाव, वय, marks))
print("नाव: {name}, वय: {age}".format(name=नाव, age=वय))

# Method 3: f-string (Best! Recommended)
print(f"नाव: {नाव}, वय: {वय}, Marks: {marks:.2f}")

# f-string मध्ये expressions वापरता येतात!
print(f"5 + 3 = {5 + 3}")
print(f"Upper: {नाव.upper()}")
print(f"वय × 2 = {वय * 2}")
नाव: प्रिया, वय: 22, Marks: 87.57 नाव: प्रिया, वय: 22, Marks: 87.57 नाव: प्रिया, वय: 22, Marks: 87.57 नाव: प्रिया, वय: 22 नाव: प्रिया, वय: 22, Marks: 87.57 5 + 3 = 8 Upper: प्रिया वय × 2 = 44
Width, Alignment and Precision
Professional programs मध्ये output neatly aligned असतो. Tables, reports, invoices बनवायला width आणि alignment formatting जरुरी आहे. हे topic कुठल्याही मराठी Python blog मध्ये नाही!
# Width — किती characters ची जागा?
print(f"{'नाव':20} {'Marks':10} {'Grade':5}")
print(f"{'-'*35}")

students = [("राहुल पाटील", 88, "A"), ("प्रिया शर्मा", 95, "A+"), ("अमित", 72, "B")]
for नाव, m, g in students:
    print(f"{नाव:20} {m:<10} {g:5}")

print("\n--- Alignment ---")
# < left align (default for strings)
print(f"{'Python':<15}|")   # left
# > right align (default for numbers)
print(f"{'Python':>15}|")   # right
# ^ center align
print(f"{'Python':^15}|")   # center
# Fill character
print(f"{'Python':*^15}|")  # center with *

print("\n--- Number Formatting ---")
pi = 3.14159265
print(f"Pi = {pi}")          # default
print(f"Pi = {pi:.2f}")      # 2 decimal places
print(f"Pi = {pi:.4f}")      # 4 decimal places
print(f"Pi = {pi:10.3f}")    # width 10, 3 decimals

amount = 1500000
print(f"Amount: ₹{amount:,}")     # comma separator
print(f"Amount: {amount:.2e}")    # scientific notation
print(f"Hex: {255:x}, Oct: {255:o}, Bin: {255:b}")
नाव Marks Grade
-----------------------------------
राहुल पाटील 88 A
प्रिया शर्मा 95 A+
अमित 72 B
--- Alignment ---
Python |
Python|
Python |
****Python*****|
--- Number Formatting ---
Pi = 3.14159265
Pi = 3.14
Pi = 3.1416
Pi = 3.142
Amount: ₹1,500,000
Amount: 1.50e+06
Hex: ff, Oct: 377, Bin: 11111111
input() Function – User कडून Data घेणे
# Basic input
नाव = input("तुमचे नाव लिहा: ")
print(f"नमस्कार, {नाव}! lgrow.in वर स्वागत आहे.")

# input() चा return type नेहमी string असतो!
x = input("एक संख्या लिहा: ")
print(f"तुम्ही लिहिले: {x}")
print(f"Type: {type(x)}")  # <class 'str'> — नेहमी string!

# Tip: prompt नेहमी descriptive ठेवा
email = input("Email address (उदा: rahul@gmail.com): ")
mobile = input("10-digit Mobile Number: ")
तुमचे नाव लिहा: राहुल नमस्कार, राहुल! lgrow.in वर स्वागत आहे. एक संख्या लिहा: 42 तुम्ही लिहिले: 42 Type: <class 'str'>
⚠ सर्वात महत्त्वाचे: input() नेहमी STRING देतो!
x = input(“संख्या: “) → x चा type str आहे, int नाही!
त्यामुळे x + 5 करायचे असेल तर आधी int(x) + 5 असे convert करावे लागते.
x + x → “4242” (string concatenation), int(x) + int(x) → 84 (addition)
Type Conversion – Input ला Number बनवणे
# String → Integer
वय = int(input("वय टाका: "))
print(f"10 वर्षांनंतर वय: {वय + 10}")

# String → Float
किंमत = float(input("किंमत टाका: "))
gst = किंमत * 0.18
print(f"GST (18%): ₹{gst:.2f}")
print(f"Total: ₹{किंमत + gst:.2f}")

# String → Boolean (manual)
answer = input("Member आहात का? (yes/no): ")
is_member = answer.lower() in ["yes", "y", "हो"]
print(f"Member: {is_member}")
if is_member:
    print("20% discount मिळेल!")
वय टाका: 22 10 वर्षांनंतर वय: 32 किंमत टाका: 1000 GST (18%): ₹180.00 Total: ₹1180.00 Member आहात का? (yes/no): yes Member: True 20% discount मिळेल!
Multiple Input एकाच Line मध्ये
competitive programming आणि real projects मध्ये एकाच line मध्ये अनेक values input घ्याव्या लागतात. हे map() आणि split() वापरून करता येते.
नाव वय शहर टाका: राहुल 22 पुणे
राहुल | 22 | पुणे
3 numbers टाका: 10 20 30
बेरीज: 60
5 marks टाका: 85 92 78 90 88
एकूण: 433
सरासरी: 86.6%
फळे टाका: आंबा, केळे, संत्रा
फळे: ['आंबा', 'केळे', 'संत्रा']
Input Validation + Error Handling
Real-world programs मध्ये user चुकीचा input देऊ शकतो, “abc” ऐवजी number देणे, negative वय देणे, रिकामे input. हे handle न केल्यास program crash होतो. Input validation हा production-ready code साठी जरुरी आहे.
# Method 1: try-except वापरून safe input
def safe_int_input(prompt):
    """Valid integer मिळेपर्यंत विचारत राहा"""
    while True:
        try:
            value = int(input(prompt))
            return value
        except ValueError:
            print("❌ चुकीचा input! फक्त संख्या टाका.")

# Method 2: Range validation
def get_age():
    while True:
        try:
            वय = int(input("वय टाका (1-120): "))
            if 1 <= वय <= 120:
                return वय
            print("❌ वय 1 ते 120 मध्ये असणे जरुरी!")
        except ValueError:
            print("❌ Valid number टाका!")

# Method 3: Email validation
def get_email():
    while True:
        email = input("Email: ").strip()
        if "@" in email and "." in email and len(email) > 5:
            return email
        print("❌ Valid email टाका (उदा: rahul@gmail.com)")

# Method 4: Choice validation
def get_choice(options):
    print(f"Options: {', '.join(options)}")
    while True:
        choice = input("निवड करा: ").strip().lower()
        if choice in options:
            return choice
        print(f"❌ फक्त {options} मधून निवड करा!")

# Use करा
संख्या = safe_int_input("एक संख्या टाका: ")
print(f"✓ तुमची संख्या: {संख्या}")
lang = get_choice(["python", "java", "c++"])
print(f"✓ तुम्ही निवडले: {lang}")
एक संख्या टाका: abc ❌ चुकीचा input! फक्त संख्या टाका. एक संख्या टाका: 42 ✓ तुमची संख्या: 42 Options: python, java, c++ निवड करा: rust ❌ फक्त ['python', 'java', 'c++'] मधून निवड करा! निवड करा: python ✓ तुम्ही निवडले: python
Password Input – getpass Module
Login systems मध्ये password टाइप करताना screen वर दिसू नये. getpass module हे काम करतो, हे कुठल्याही मराठी blog मध्ये नाही!
import getpass

# Password input — screen वर दिसत नाही
username = input("Username: ")
password = getpass.getpass("Password: ")  # *** दिसत नाही

# Validation
SAVED_USER = "admin"
SAVED_PASS = "lgrow@2026"

if username == SAVED_USER and password == SAVED_PASS:
    print("✓ Login Successful! Welcome!")
else:
    print("✗ Invalid username or password!")
Username: admin
Password: [input hidden]
✓ Login Successful! Welcome!
File Input/Output – File Read आणि Write
Real programs मध्ये data file मध्ये save आणि read करावा लागतो. open() function, with statement, आणि read/write modes — हे सर्व File I/O चा भाग आहे.
| Mode | अर्थ | File नसेल तर |
|---|---|---|
| “r” | Read — फक्त वाचणे | Error येतो |
| “w” | Write — नवे लिहिणे | नवी file बनते |
| “a” | Append — शेवटी जोडणे | नवी file बनते |
| “r+” | Read + Write | Error येतो |
| “w+” | Write + Read | नवी file बनते |
# File WRITE — data save करणे
with open("students.txt", "w", encoding="utf-8") as f:
    f.write("=== विद्यार्थी यादी ===\n")
    f.write("राहुल पाटील | 88% | Grade A\n")
    f.write("प्रिया शर्मा | 95% | Grade A+\n")
    f.write("अमित देशमुख | 72% | Grade B\n")
print("✓ File saved: students.txt")

# File READ — data वाचणे
with open("students.txt", "r", encoding="utf-8") as f:
    content = f.read()
print("\n--- File Content ---")
print(content)

# Line by line READ
with open("students.txt", "r", encoding="utf-8") as f:
    for i, line in enumerate(f, 1):
        print(f"Line {i}: {line.strip()}")

# APPEND — नवे data जोडणे
with open("students.txt", "a", encoding="utf-8") as f:
    f.write("सुमित जोशी | 80% | Grade A\n")
print("✓ New student added!")
✓ File saved: students.txt --- File Content --- === विद्यार्थी यादी === राहुल पाटील | 88% | Grade A प्रिया शर्मा | 95% | Grade A+ अमित देशमुख | 72% | Grade B Line 1: === विद्यार्थी यादी === Line 2: राहुल पाटील | 88% | Grade A Line 3: प्रिया शर्मा | 95% | Grade A+ Line 4: अमित देशमुख | 72% | Grade B ✓ New student added!
✓ File saved: students.txt

--- File Content ---
=== विद्यार्थी यादी ===
राहुल पाटील | 88% | Grade A
प्रिया शर्मा | 95% | Grade A+
अमित देशमुख | 72% | Grade B

Line 1: === विद्यार्थी यादी ===
Line 2: राहुल पाटील | 88% | Grade A
Line 3: प्रिया शर्मा | 95% | Grade A+
Line 4: अमित देशमुख | 72% | Grade B
✓ New student added!
sys.stdin and sys.stdout
Competitive programming आणि advanced scripts मध्ये sys module वापरून faster input/output करतात. sys.stdin input साठी आणि sys.stdout output साठी.
import sys

# sys.stdout.write — print() पेक्षा fast
sys.stdout.write("नमस्कार! हे sys.stdout आहे.\n")

# Faster input for competitive programming
# input = sys.stdin.readline

# Error output stderr वर
sys.stderr.write("Warning: हे error message आहे!\n")

# Output ला file वर redirect करा
original_stdout = sys.stdout
with open("output.txt", "w", encoding="utf-8") as f:
    sys.stdout = f
    print("हे file मध्ये save होईल!")
    print("Screen वर दिसणार नाही.")
    sys.stdout = original_stdout  # restore

print("✓ output.txt मध्ये text save झाला")
नमस्कार! हे sys.stdout आहे. Warning: हे error message आहे! ✓ output.txt मध्ये text save झाला
Real-World Projects – 5 Complete Examples
ATM System: PIN validation, balance check, withdrawal with formatting
Student Report: Multiple input, marks calculation, file save.
Shopping Bill: Item list, price calculation, formatted bill print.
Login System: getpass, validation, attempt tracking.
Note Saver: User input घेऊन file मध्ये save, read करणे.
Advanced Calc: Safe input validation, all operations, formatted output.
Project: Validated Shopping Bill Generator
# Validated Shopping Bill Generator
def get_positive_int(prompt):
    while True:
        try:
            val = int(input(prompt))
            if val > 0: return val
            print("❌ 0 पेक्षा जास्त असणे जरुरी")
        except ValueError: print("❌ Valid number टाका")

def get_positive_float(prompt):
    while True:
        try:
            val = float(input(prompt))
            if val > 0: return val
            print("❌ 0 पेक्षा जास्त असणे जरुरी")
        except ValueError: print("❌ Valid किंमत टाका")

cart = []
print("🛒 Shopping Bill Generator")
print(f"{'='*45}")

while True:
    item = input("\nItem नाव (exit टाइप करा थांबायला): ").strip()
    if item.lower() == "exit": break
    if not item: continue
    qty = get_positive_int("Quantity: ")
    price = get_positive_float("किंमत (₹): ")
    cart.append((item, qty, price))
    print(f"✓ Added: {item} × {qty} = ₹{qty*price:.2f}")

print(f"\n{'='*45}")
print(f"  🏪 Learn Grow Store — Bill")
print(f"{'='*45}")
print(f"{'Item':<18} {'Qty':>4} {'Price':>8} {'Total':>9}")
print(f"{'-'*45}")

subtotal = 0
for item, qty, price in cart:
    total = qty * price
    subtotal += total
    print(f"{item:<18} {qty:>4} {price:>8.2f} {total:>9.2f}")

gst = subtotal * 0.18
grand_total = subtotal + gst
print(f"{'-'*45}")
print(f"{'Subtotal':>32}: ₹{subtotal:>8.2f}")
print(f"{'GST (18%)':>32}: ₹{gst:>8.2f}")
print(f"{'GRAND TOTAL':>32}: ₹{grand_total:>8.2f}")
print(f"{'='*45}")
print("  धन्यवाद! lgrow.in वर भेट द्या")
🛒 Shopping Bill Generator
=============================================
Item नाव: तांदूळ
Quantity: 5
किंमत (₹): 60
✓ Added: तांदूळ × 5 = ₹300.00
Item नाव: डाळ
Quantity: 2
किंमत (₹): 120
✓ Added: डाळ × 2 = ₹240.00
Item नाव: exit
=============================================
🏪 Learn Grow Store — Bill
=============================================
Item Qty Price Total
---------------------------------------------
तांदूळ 5 60.00 300.00
डाळ 2 120.00 240.00
---------------------------------------------
Subtotal: ₹ 540.00
GST (18%): ₹ 97.20
GRAND TOTAL: ₹ 637.20
=============================================
धन्यवाद! lgrow.in वर भेट द्याPython Actual Programming Meaning in Marathi
Python ही एक high-level, easy-to-learn आणि powerful programming language आहे. आज Python चा वापर:
1. Web Development
2. Data Science
3. Artificial Intelligence
4. Machine Learning
5. Automation
6. Software Development
Python input म्हणजे काय?
Input म्हणजे user कडून डेटा घेणं.
Python मध्ये आपण input() function वापरून user कडून माहिती घेतो.
🔹 Syntax:
variable = input(“Message”)
🔹 Example:
name = input(“तुमचं नाव लिहा: “)
print(“नमस्कार”, name)
🔹 Output:
तुमचं नाव लिहा: Rupesh
नमस्कार Rupesh
👉 लक्षात ठेवा: input() ने मिळणारा डेटा नेहमी string type मध्ये असतो.
Python Output म्हणजे काय?
Output म्हणजे program चा result screen वर दाखवणं.
Python मध्ये output साठी आपण print() function वापरतो.
🔹 Example:
print(“Welcome to Python Learning in Marathi”)
Integer Input कसा घ्यायचा?
जर user कडून number घ्यायचा असेल, तर type conversion आवश्यक आहे.
a = int(input(“पहिला नंबर टाका: “))
b = int(input(“दुसरा नंबर टाका: “))
print(“बेरीज =”, a + b)
Float Input कसा घ्यायचा?
price = float(input(“किंमत टाका: “))
print(“Final Price:”, price)
वास्तविक जीवनातील प्रॅक्टिकल उदाहरणे – Real-Life Practical Examples – Python Input & Output (Top 10 Use Cases)

खाली 10 Real-Life Practical Examples दिले आहेत, जे Python Input & Output समजण्यासाठी आणि practice साठी खूप उपयोगी आहेत:
1. Simple Calculator
num1 = int(input(“पहिला नंबर: “))
num2 = int(input(“दुसरा नंबर: “))
print(“बेरीज:”, num1 + num2)
print(“वजाबाकी:”, num1 – num2)
print(“गुणाकार:”, num1 * num2)
print(“भागाकार:”, num1 / num2)
2. Student Marksheet System
name = input(“विद्यार्थ्याचं नाव: “)
marks = int(input(“मार्क्स: “))
print(f”{name} चे एकूण मार्क्स: {marks}”)
3. Age Eligibility Checker (Voting System)
age = int(input(“तुमचं वय: “))
if age >= 18:
print(“तुम्ही मतदानासाठी पात्र आहात”)
else:
print(“तुम्ही मतदानासाठी पात्र नाही”)
4. Login Authentication System
username = input(“Username: “)
password = input(“Password: “)
if username == “admin” and password == “1234”:
print(“Login Successful”)
else:
print(“Invalid Credentials”)
5. ATM Withdrawal Program
balance = 10000
amount = int(input(“काढायची रक्कम: “))
if amount <= balance:
print(“Transaction Successful”)
print(“Remaining Balance:”, balance – amount)
else:
print(“Insufficient Balance”)
6. Shopping Bill Generator
item = input(“Item नाव: “)
price = float(input(“Price: “))
qty = int(input(“Quantity: “))
print(f”Total Bill: ₹{price * qty}”)
7. Temperature Converter
c = float(input(“Celsius: “))
f = (c * 9/5) + 32
print(“Fahrenheit:”, f)
8. Simple Quiz App
ans = input(“भारताची राजधानी काय आहे? “)
if ans.lower() == “delhi”:
print(“बरोबर उत्तर!”)
else:
print(“चुकीचं उत्तर”)
9. Electricity Bill Calculator
units = int(input(“Units: “))
rate = 6
print(“Electricity Bill: ₹”, units * rate)
10. Movie Ticket Booking System
tickets = int(input(“तिकिटांची संख्या: “))
price = 150
print(“Total Amount: ₹”, tickets * price)
Common Mistakes (Beginner Problems)
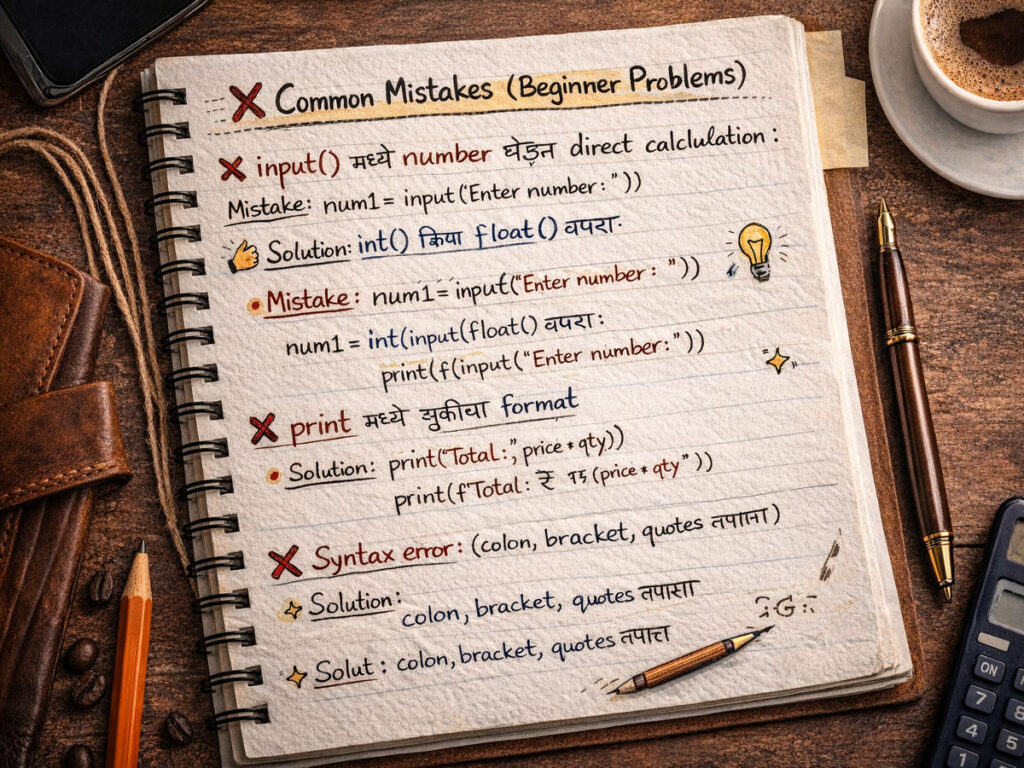
| Mistake | Solution |
| input() मध्ये number घेऊन direct calculation | int() किंवा float() वापरा |
| print मध्ये चुकीचा format | f-string वापरा |
| Syntax error | colon, bracket, quotes तपासा |
Final Conclusion
जर तुम्ही Python Programming in Marathi शिकण्याचा विचार करत असाल, तर input and output हा सर्वात पहिला आणि महत्वाचा टप्पा आहे.
FAQs
Q1. Python input output मराठीत कसं शिकायचं?
Ans: मराठी ब्लॉग, व्हिडिओ tutorials आणि रोज coding practice करून.
Q2. Python beginner साठी किती वेळ लागतो?
Ans: 1 ते 3 महिने regular practice केल्यास.
Q3. Python शिकून job मिळतो का?
Ans: हो, Python ला भारतात high demand आहे.
पुढे काय शिकाल?
Python Input Output – Interview MCQ Question and Answer Marathi
तुमच्या Interview तयारी सुधारण्यासाठी Python interview MCQ questions and Answer for freshers पाहा. यामध्ये Python interview questions and answers for freshers स्पष्टपणे दिले आहेत. Basic Python programming MCQ interview questions on Python for freshers शिकून तुमचा आत्मविश्वास वाढवा. पहिली Python नोकरी मिळवण्यासाठी हे एक संपूर्ण मार्गदर्शन आहे.